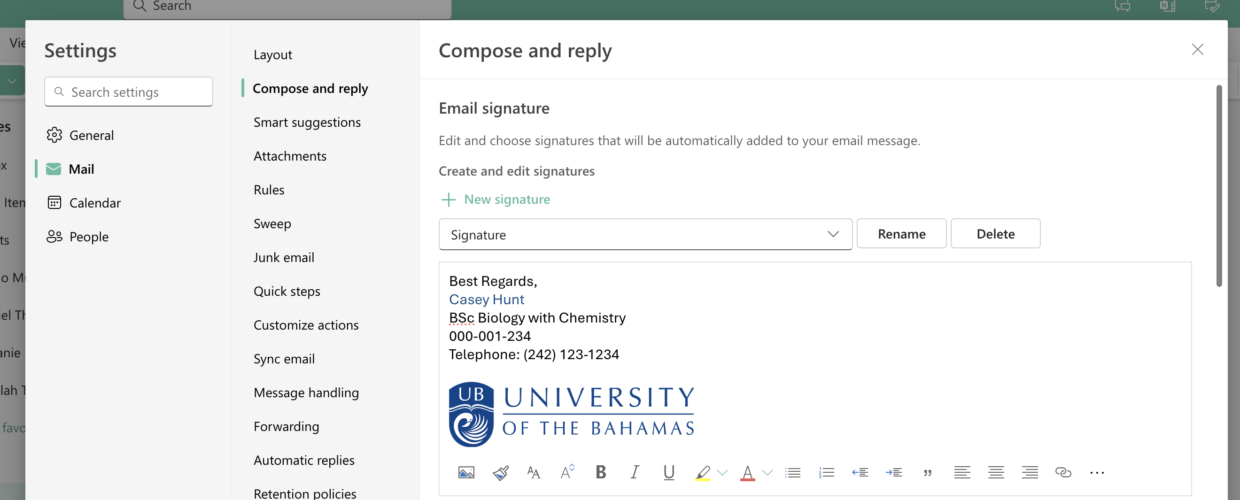
Sending emails is a fundamental part of college life, whether you’re inquiring about classes, seeking overrides, or addressing issues. One often overlooked aspect that can significantly enhance your experience is your email signature. Not only does it add a touch of personalization, but it also provides essential contact details. Today, we’ll guide you through creating an impactful email signature in Outlook, ensuring your messages stand out and you stay connected.
What to Include in Your Email Signature
- Full Name
- Student Number
- Contact Number
Why Include Your Student ID and Phone Number?
-
Efficiency: Having your phone number allows for a professor or administrative staff to contact you urgently should there be a need to.
-
Overrides and Inquiries: When seeking overrides or addressing class-related issues, having your student ID readily available expedites the resolution process.
Creating Your Signature in Outlook: A Step-by-Step Guide
Step 1: Open Outlook
Launch your Outlook application and navigate to the “Settings” at the top of the page.
Step 2: Access Options
Click on “Mail,” then “Compose and Reply”.
Step 3: Email Signature
In the Email Signature category, type your signature and use the available formatting options to change its appearance.
Step 4: Personalization
Now comes the fun part! Personalize your signature by adding your full name, your academic major (optional), your student ID number, and contact information.
Step 5: New Signature
Select the default signature for new messages and replies.
Step 6: Formatting
Ensure your signature is clear and easy to read. Use a professional font and consider bolding your name or other crucial details.
Step 7: Finishing Touches
You can add a bit of flair by incorporating your university logo or a relevant quote, but remember, simplicity is key.
Step 8: Save and Apply
Click “Save” to save your signature, and voilà! Your emails are now infused with professionalism and efficiency.
Remember, your email signature is a reflection of your professionalism. By incorporating these simple steps, you’re not just sending an email, but you’re making a statement about your commitment to clear communication and professionalism.


